Measuring your loft space might not seem like the most exciting job, but it’s one of the most useful things you can do when you’re planning to make better use of your home. Whether you’re thinking about boarding it for storage, improving your insulation, or even preparing for a future conversion, getting accurate measurements sets the foundation for everything that comes next.
Too often, people guess their loft dimensions or only measure part of the space. But taking the time to measure it properly means you’ll be able to plan more confidently, budget more accurately, and avoid running into problems halfway through a project. It’s a small effort that can save a lot of time, money, and stress.
In this guide, we’ll walk you through the exact steps to measure your loft space safely and correctly. Whether you’re tackling a DIY job or preparing for a professional quote, this advice will help you understand what’s involved and how to get it right.
How To Measure Your Loft Space
If you’re thinking about boarding your loft, adding storage, or improving insulation, the first step is knowing exactly how much space you have to work with. Measuring your loft properly helps you plan your project, get accurate quotes, and avoid costly mistakes. Whether you’re doing it yourself or preparing for a professional visit, here’s how to measure your loft space the right way.
Understanding your loft’s size and layout isn’t just useful for boarding – it can help with everything from insulation upgrades to lighting installation and future loft conversions. A simple measuring session gives you a clearer picture of what’s possible and helps avoid surprises down the line.
Why accurate measurements matter
Lofts come in all shapes and sizes, and their usable space often depends on things like headroom, joist layout, and access points. Measuring properly gives you a clear idea of how much of the loft you can realistically use, what kind of boarding system you’ll need, and whether extras like ladders or lighting will fit comfortably.
Having precise measurements also makes it easier to compare quotes from different companies. Most installers price their work by square metre, so getting this part right can save you money and hassle down the line.
If you’re planning to board the loft yourself, it’s even more important to get the measurements right. Mistakes in your planning stage can lead to materials being wasted, poor fitting, or safety issues later on.
What you’ll need before you start
To measure your loft space safely and accurately, you’ll need:
- A sturdy stepladder or loft ladder
- A tape measure (ideally at least 5 metres long)
- A notepad or phone to record your measurements
- A torch or portable light
- A second person, if possible, for safety and accuracy
Make sure you only enter your loft if it’s safe to do so. Never stand directly on insulation or between joists – always use crawl boards or a raised platform. If the loft has no boarding at all, be extra careful and consider getting help from someone experienced.
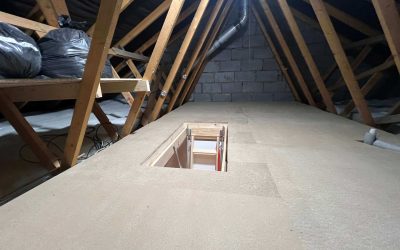
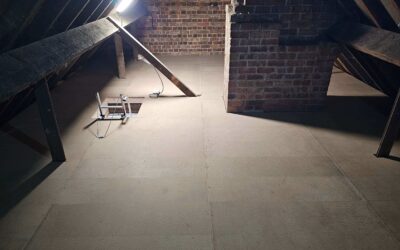
Step 1: Measure the accessible floor area
Start by measuring the full length and width of the area between the joists. Take your measurements from wall to wall at the widest points, noting the dimensions in metres. If your loft has multiple sections or angles, sketch a rough layout and mark the measurements clearly.
This gives you the total footprint of your loft, but remember: not all of that space may be suitable for boarding. Focus on the central area with good head height if you’re planning to use it for storage.
You can also divide your measurements into smaller sections, especially if the space is uneven or includes obstructions. This helps create a clearer picture and can be helpful when ordering boarding materials.
Step 2: Check the headroom
Headroom plays a big role in how usable your loft space really is. Measure from the top of the joists to the highest point of the roof. A minimum of 2.2 metres is ideal for comfortable access, but even lower spaces can still work for storage.
Note any beams, pipes, or obstructions that reduce the height in parts of the loft. This will help you decide where to place boards, lighting, or shelves.
If you ever plan to convert your loft into a usable room, like an office or bedroom, headroom becomes even more important. While boarding for storage doesn’t have to meet building regulations, conversions do – so it’s worth keeping future plans in mind.
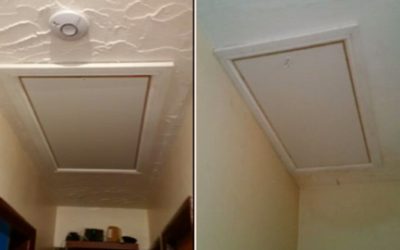
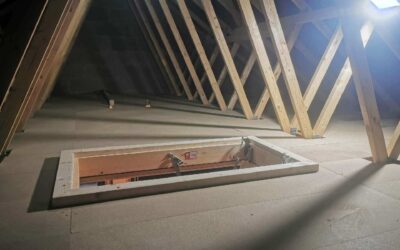
Step 3: Measure the hatch opening
Accurate hatch dimensions are important, especially if you’re planning to install a loft ladder. Measure the width and length of the opening and check if there’s enough clearance to fit a ladder safely.
Also note the distance from the hatch to the nearest wall or obstacle. This helps when choosing the right ladder type and ensures there’s enough space to climb safely.
If you find the hatch too small or awkward, you may need a new hatch fitted. Some companies offer insulated, easy-access hatches that are draught-proof and better suited to modern loft use.
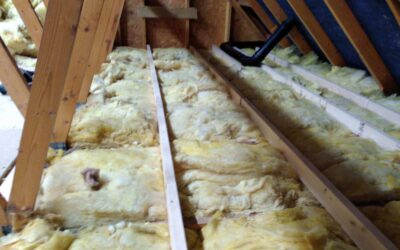
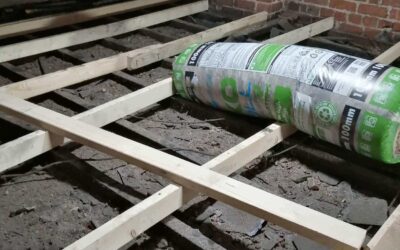
Step 4: Assess insulation depth
Take a quick measurement of your insulation. In most homes, this should be around 270mm to meet modern standards. If it’s less than this, you may want to top it up before boarding. If it’s already at full depth, you’ll likely need a raised boarding system to avoid compressing the insulation.
Don’t be tempted to lay boards directly onto insulation or joists – this can reduce insulation performance and cause issues with ventilation. Proper raised systems protect both your insulation and the structure of your home.
Step 5: Identify any tricky areas
Make a note of anything that could make boarding more complex – awkward angles, water tanks, chimney stacks, or cables. These details are helpful if you’re asking for quotes and will help installers plan the job more efficiently.
Measure the distance around or between any major obstructions. If you plan to store items in these areas, you’ll need to factor in access routes and avoid blocking important parts of your loft, like pipework or electrical wiring.
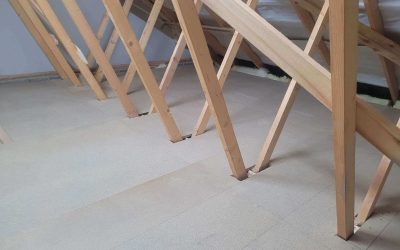
Step 6: Note the joist spacing
This step is often overlooked, but knowing the spacing between joists can help determine which boarding system is best. Most modern lofts have joists spaced 400mm or 600mm apart. Measure the gap between the centres of two adjacent joists for an accurate reading.
Raised boarding systems usually fit directly onto the joists, so knowing this measurement will help when ordering supports or frame kits.
Final tips
- Always put safety first. If you’re not confident accessing your loft, leave the measuring to the professionals.
- Take photos as you go – they can be useful for planning or showing installers.
- Round up your measurements slightly to allow for any adjustments.
- Store your notes in a safe place in case you need to refer back later.
Need help?
If you’re not sure about measuring your loft yourself, or just want some friendly advice, get in touch with the team at Yorkshire Loft Ladders. You can also call 0800 612 8359 to arrange a free, no-obligation survey and get expert guidance on making the most of your loft space.
Professional surveys don’t just save time – they can highlight opportunities you might not have spotted. Whether you’re aiming for a clean and simple storage solution or planning future upgrades, a measured approach is the best place to start.
Loft Ladders Hampsthwaite – Loft Ladders Killinghall – Loft Ladders Heckmondwike