Autumn is often the first time homeowners notice a problem with damp or condensation in their loft. You might go upstairs to retrieve Christmas decorations, put away summer items or simply check the roof space and discover damp insulation, water droplets, dark patches or mould.
These problems can appear suddenly, but in many cases the conditions that cause them have been developing for some time.
As temperatures fall, the difference between the warm air inside your home and the colder air within the loft becomes much greater. Warm, moisture-laden air naturally rises. If it reaches a cold roof surface and cannot escape through adequate loft ventilation, that moisture can turn into condensation.
Understanding why this happens — and dealing with the cause rather than simply cleaning away the visible moisture — can help protect your insulation, roof timbers and belongings throughout winter.
Why Loft Condensation Gets Worse in Autumn and Winter
Condensation is created when warm, humid air meets a sufficiently cold surface.
During autumn and winter, everyday activities such as showering, bathing, cooking, drying clothes and even breathing add moisture to the air inside your home.
Some of this warm air can make its way upwards through:
- Loft hatches
- Gaps around pipes
- Electrical cables
- Ceiling light fittings
- Cracks and openings in ceilings
- Poorly sealed service penetrations
Once the warm air reaches an unheated loft, it can come into contact with cold roof felt, tiles, timbers and other surfaces.
The moisture then condenses into water droplets.
You may notice beads of water underneath roofing felt, damp roof timbers or patches of wet insulation. In more persistent cases, mould can begin to develop.
This is why loft condensation often seems to appear suddenly when the weather becomes colder, despite there being no obvious problem during the summer.
Is It Condensation or a Roof Leak?
Finding water inside a loft does not automatically mean that your roof is leaking.
Determining whether moisture is coming from a leak or from condensation is an important first step.
Roof leaks tend to be more localised. You might notice a particularly wet area below a roof tile, flashing detail, chimney, valley or other part of the roof structure. The damp may also become noticeably worse following heavy rain.
Condensation tends to be distributed more widely.
You might see droplets across a large section of roofing felt or dampness appearing on several roof timbers at the same time. It can also be noticeably worse during cold weather, particularly first thing in the morning.
Other signs of loft condensation can include:
- Water droplets underneath roof felt
- Damp or discoloured roof timbers
- Mould growth
- A musty smell
- Damp cardboard boxes
- Wet or compressed insulation
- Rust forming on metal fixings
- Moisture appearing despite dry weather
It is possible for a loft to experience both a roof leak and condensation, so persistent damp should never simply be assumed to have one cause.
Check Your Loft Ventilation
Good loft ventilation allows moisture-laden air to escape before it condenses on cold surfaces.
Most traditional cold-roof lofts are designed to have air flowing through the roof space. Fresh air normally enters around the eaves and moves through the loft before leaving through other ventilation points.
Problems can develop when these ventilation routes become restricted.
One of the first areas to inspect is the edge of the loft where the roof meets the external walls.
Insulation should provide good coverage without completely blocking the ventilation path at the eaves. Depending on the roof construction, a ventilation gap of around 25mm to 50mm may be required to allow air to move freely.
If insulation has been pushed tightly into the eaves, it can restrict this airflow.
Appropriate ventilation solutions can include soffit vents, eaves ventilation, roof ventilation and ventilation installed through suitable roofing details.
Felt lap vents may also be suitable for some roofs. These are positioned between overlaps in roofing felt to help increase airflow through the loft.
The correct ventilation method depends on the design and construction of the roof, so simply adding as many vents as possible is not necessarily the solution.
The aim is controlled, effective airflow throughout the loft.
Keep Existing Ventilation Routes Clear
Even when a loft already has ventilation, the openings need to remain unobstructed.
Check that ventilation points have not become blocked by:
- Insulation
- Stored belongings
- Dust and debris
- Insect nests
- Bird nesting material
- Leaves
- Previous building work
Air should be able to travel across the loft rather than entering through one vent and immediately becoming trapped.
Maintaining airflow from one side of the roof space to the other can make a significant difference to condensation levels.
Stop Warm, Moist Air Entering the Loft
Improving loft ventilation is only one part of controlling condensation.
You should also reduce the amount of warm, humid air entering the loft from the rooms below.
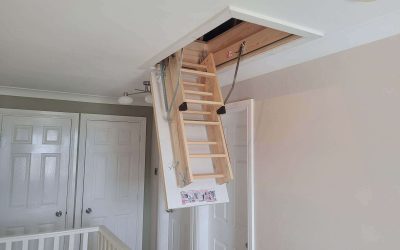
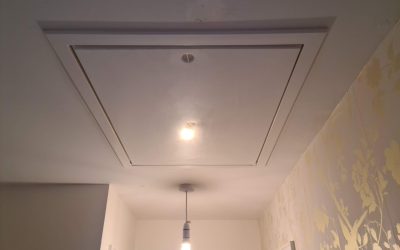
The loft hatch is a common source of air leakage.
Draught-proofing strips around the edge of the hatch can reduce the movement of warm air into the roof space. An insulated loft hatch can also help reduce heat loss while improving the separation between the warm rooms below and the colder loft space above.
Other openings through the ceiling should also be checked.
Pipes, cables and other penetrations can leave small gaps through which warm air continually enters the loft. Suitable sealing around these areas can reduce unwanted airflow while still allowing services to remain safe and accessible.
Light fittings also need particular care because some types require adequate clearance around them. Electrical components should not simply be covered with insulation or sealant without first checking that it is safe to do so.
Check Bathroom and Kitchen Extractor Fans
Extractor fans can cause serious loft condensation problems if they are installed incorrectly.
Bathroom and kitchen fans are designed to remove warm, humid air from inside the property and discharge it outdoors.
An extractor duct should therefore terminate outside the building.
If a duct becomes disconnected or ends inside the loft, large amounts of moisture can be pumped directly into the roof space every time somebody showers, cooks or uses the fan.
Check any visible extractor ducting in your loft.
Look for:
- Disconnected ducting
- Split or damaged flexible pipes
- Loose joints
- Ducts ending inside the loft
- Excessive condensation inside ducting
Correcting an extractor problem can sometimes resolve a major source of moisture entering the loft.
Reduce Humidity Inside Your Home
Controlling humidity within the living areas of your home can also reduce the likelihood of loft condensation.
Bathrooms and kitchens naturally create considerable amounts of moisture.
Use extractor fans when showering, bathing or cooking and allow them to continue running long enough to remove humid air.
Where fitted, trickle vents should generally remain open to help maintain background ventilation.
Laundry can also create significant amounts of moisture.
Whenever possible, dry clothes outdoors. If clothes need to be dried inside during winter, keeping them within a ventilated room or using an appropriate dehumidifier can help reduce the amount of moisture spreading throughout the property.
A home does not need to feel noticeably damp for humidity to eventually cause problems inside a cold loft.
Do Not Block Insulation When Boarding Your Loft
Loft boarding needs to be planned carefully.
A common mistake is to lay loft flooring directly over insulation or compress thick insulation beneath boards.
Compressed loft insulation can become less effective and may also interfere with the airflow a loft needs to remain dry.
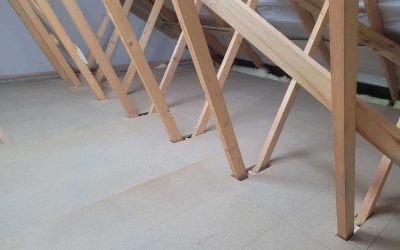
Modern insulation is often deeper than the ceiling joists. Flooring therefore needs to be positioned appropriately above the insulation rather than simply crushing it down to joist level.
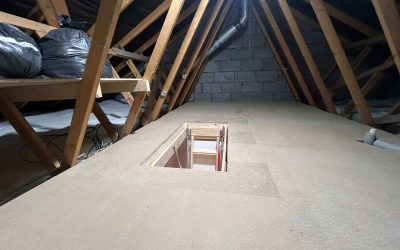
Using loft legs or another suitable raised flooring system can help create usable storage space while preserving the required insulation depth beneath the boards.
Correctly planned loft boarding can create practical storage while preserving both insulation and ventilation routes.
The boarding system should allow the insulation beneath it to continue performing properly, and the overall layout should avoid blocking ventilation around the eaves.
This is particularly important if your loft already experiences condensation.
Covering an existing moisture problem with flooring will not solve it.
Before installing loft boards, it makes sense to understand how the roof is ventilated, whether the insulation has been installed correctly and whether there are already signs of damp.
A loft survey can identify potential issues before flooring is installed.
Keep Stored Items Away From Damp-Prone Areas
Storage can also restrict airflow inside a loft.
Large boxes, furniture and bags packed tightly against roof slopes or external walls can create areas where air cannot circulate effectively.
Try to leave space around stored belongings.
Where possible:
- Keep boxes away from roof surfaces
- Avoid packing belongings tightly against external walls
- Leave ventilation routes unobstructed
- Keep stored items slightly raised from vulnerable surfaces
- Avoid placing moisture-sensitive items directly onto potentially cold surfaces
Plastic storage boxes can provide better protection than cardboard if condensation occasionally occurs, but storage containers should not be treated as a solution to an underlying damp problem.
Check Your Loft Before Winter Properly Arrives
October is a useful time to inspect your loft because colder weather is beginning but the most severe winter conditions have usually not yet arrived.
Take a torch and look carefully around the roof space.
Check the underside of the roof covering, timbers, insulation, ventilation openings and any stored belongings.
Pay particular attention to areas around chimneys, roof junctions, extractor ducting and the loft hatch.
If you already see signs of damp or condensation in autumn, dealing with the cause before temperatures fall further can prevent the problem becoming worse during winter.
When Should You Seek Professional Advice?
A small amount of occasional condensation does not necessarily mean that your loft has a serious structural problem.
Persistent moisture, however, should be investigated.
Professional advice may be appropriate if you discover:
- Significant mould growth
- Repeated condensation across the roof
- Soaking-wet insulation
- Damp roof timbers
- Water staining that may indicate a roof leak
- Rotting or softened timber
- Poor or inaccessible ventilation
- Extractor fans venting into the loft
- Damp returning after ventilation improvements
- Uncertainty about how your loft insulation has been installed
It is particularly important to investigate existing damp before carrying out loft boarding or installing a new loft floor.
Adding flooring without understanding the existing ventilation and insulation arrangement can make problems harder to identify and potentially more difficult to correct later.
Plan Loft Boarding Around Ventilation and Insulation
A well-planned loft floor should provide practical storage without compromising the way the loft performs.
That means considering more than simply the position of the floorboards.
The condition and depth of the insulation, ventilation routes, electrical services, pipework and general condition of the loft should all be considered before work starts.
Correctly planned loft boarding can preserve the required insulation beneath the floor while maintaining airflow around the roof space.
For homeowners considering loft improvements in West Yorkshire, services such as loft services in Morley can include properly planned boarding designed around insulation, airflow and usable storage.
If you are considering boarding your loft this autumn or winter, arranging a loft survey first can highlight any signs of condensation, damp or ventilation problems before they become hidden beneath a new floor.
Addressing these issues at the planning stage is far easier than discovering them after the loft has already been boarded.
Keep Your Loft Dry This Winter
Most winter loft condensation problems come down to two factors: excessive moisture entering the roof space and insufficient airflow allowing that moisture to escape.
Reducing household humidity, sealing unnecessary air leakage into the loft, checking extractor fans and keeping ventilation routes clear can all help.
It is also important to ensure that insulation and loft flooring work together rather than competing for the same space.
If you discover damp, mould or condensation while retrieving your Christmas decorations this autumn, do not simply wipe the moisture away and forget about it.
Finding the source and dealing with the underlying ventilation or moisture problem can help protect your insulation, roof structure and stored belongings throughout the colder months.
Loft Ladders Starbeck – Loft Ladders Killinghall – Loft Ladders Hampsthwaite